Using A Featherboard

Using A Featherboard Stlfinder

Make A Featherboard For Your Table Saw

Rolling Featherboard Uploading Using Sendto Flickr Develop Flickr
Heres how to use a featherboard.
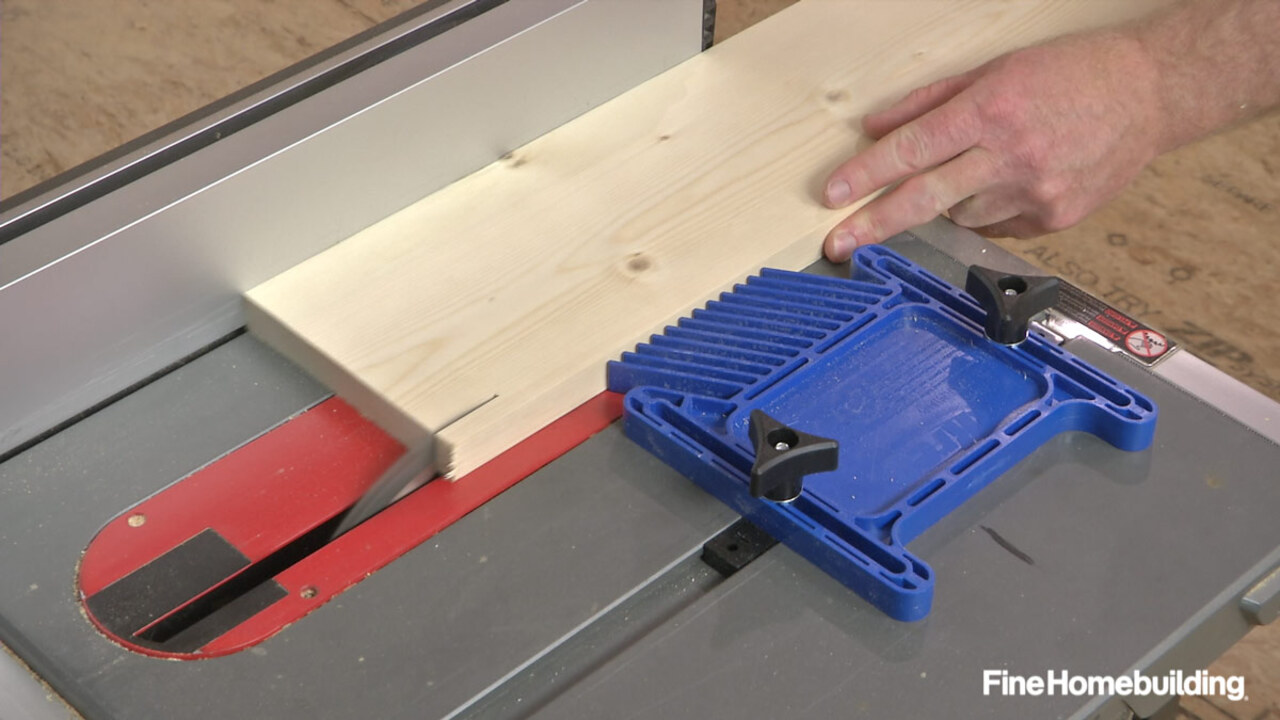
Using a featherboard. This video is an accompaniment to an article i wrote for the june 2009 issue of popular woodworking magazine. Using a featherboard also offers safety benefits. Using a featherboard is much safer than trying to hold a workpiece against the fence by hand during rip cuts. If you do not have a bevel you can merely measure more than 3 inches from each edge of the 30 degree miter cut and make a pencil mark.
Cut a 30 degree angle on one end of the featherboard blank first. The video focuses on featherboards and push sticks and the article covers a broader. Mark a line 3 inches in from the mitered end of the board parallel to the 30 degree mitered cut using a bevel or a layout square. Why you should use them what some of your options are and where to learn more about them.
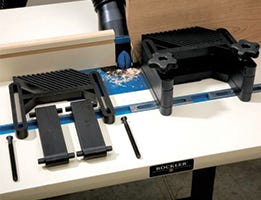
The safest way to make featherboards is on the bandsaw using a simple sled with a miter slot runner. Commercial featherboards are sold by woodworking supply stores and online retailers but many woodworkers make their own featherboards by cutting a series of kerfs into one side of a flat board cut at an angle on one end. Because of the angled orientation of its fingers when a featherboard is set up to apply a gentle pressure it will allow stock to move easily in the direction of the cut while all but preventing movement in reverse. If youre using a manufactured featherboard it likely will just slide into the miter groove on your tablesaw if its a homemade featherboard you will just place it on the table position the tool with the angled end pointed in the feed direction.

Review Magswitch Featherboard A Dream To Use By Grumpy

Magswitch Universal Featherboard Pro 81101303 Magswitch Technology
How To Use A Featherboard With Woodworking Tools

Pressreader Wood 2020 05 01 Using A Dado Set

How To Make And Use A Featherboard Finewoodworking
Why Use Featherboards Rockler

How To Use A Feather Board With Woodworking Tools Cut The Wood

Feather Boards How I Make Them Gordgraff Com
How To Use A Featherboard When Rip Cutting Wood On A Tablesaw
