How To Make A Finger Joint Step By Step

Finger Joint Basics Startwoodworking Com
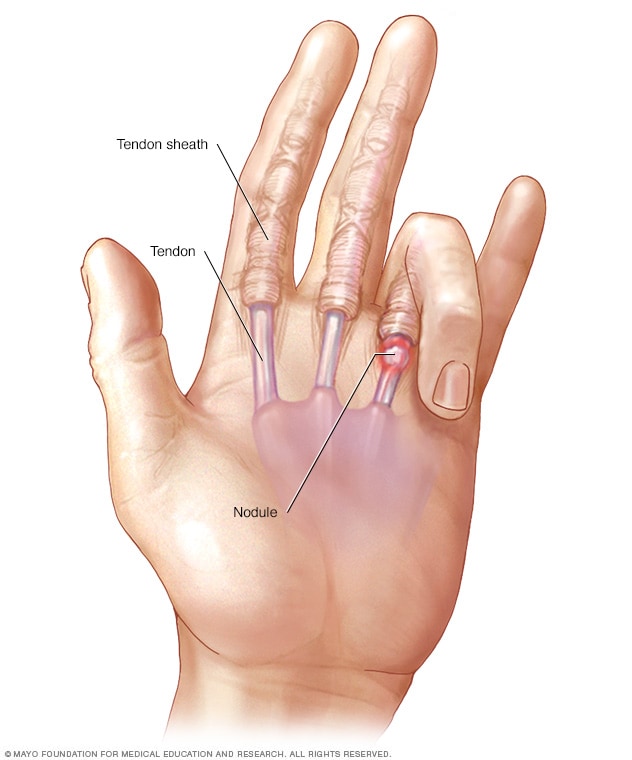
Trigger Finger Symptoms And Causes Mayo Clinic

Mallet Finger Nhs Nhs
This instructable is for a box joint jig which is necessary for this particular carpentry technique.

How to make a finger joint step by step. A pencil is used to mark the thickness of the material. Step 3 clean up the joint and make it fit. The finger joint is a type of cut that is made into the edge of two pieces of wood. Step it up steve ramsey woodworking for mere mortals.
When the fingers are joined together you will create a 90 degree angle. Structural sub structural and non structural finger joints. It would be a good idea to check how the joint lines up regularly to make sure you are not removing too much wood. Make this box joint jig in minutes.
I made it at techshop in menlo park. The base should be the same length as that of the router table. Finger joint step by step with tools included. Finger joint jig beginner woodworking diy duration.
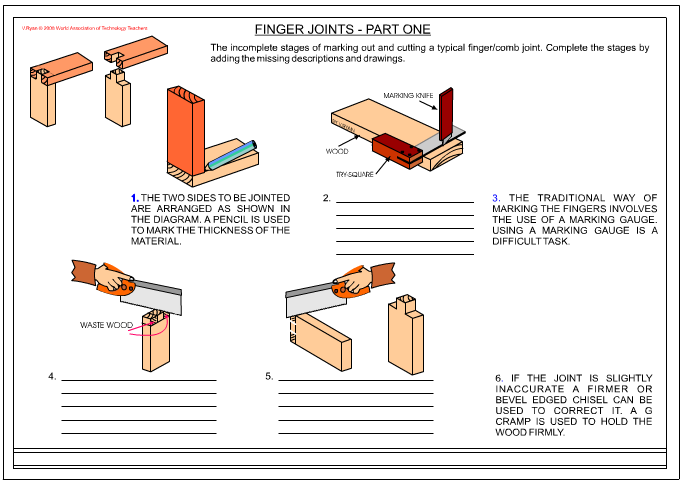
In essence the finger or comb joint is an asthetic one and if created correctly can make a seemingly ordinary object come alive with style and design and to this end the timber you use is highly important. The two sides to be jointed are arranged as shown in the diagram. You can create finder joints by using a standard table saw. Now you will use a chisel to make the joint come together.
To create this instruct able youll need the following parts. Box finger joint jig. After they have been measured and cut to the correct size sand the edges to ensure that they are smooth and ready to be fitted together. You are recommended to use the same type of router bit like the same one you will use in making finger joints which should be a inch.
Make a groove lengthwise down the piece of the plywood to prepaying the base. The marking out and cutting procedure is outlined below. To begin prepare the wood that you will be fitting together. Step 1 preparation.
Timber and tools used for finger joints. The first step is marking out the cuts. With the chisel remove the remaining wood in the way of the joint. This is done to create a box shape such as that used in the construction of a drawer.
If you are unsure of how wide you want each of the individual fingers of the joint to be experiment with a piece of paper. Make the base step 1. These will be the sides of the finger joint box.
Make A Perfect Miter Joint Family Handyman

Finger Joint Table Popular Woodworking Magazine

Https Encrypted Tbn0 Gstatic Com Images Q Tbn 3aand9gcsb1tsexm6bya Yqwh4krqhzmqtmg3kwfq5xzkhi1xyc9wk53if Usqp Cau
Marking Out A Finger Joint Part 1
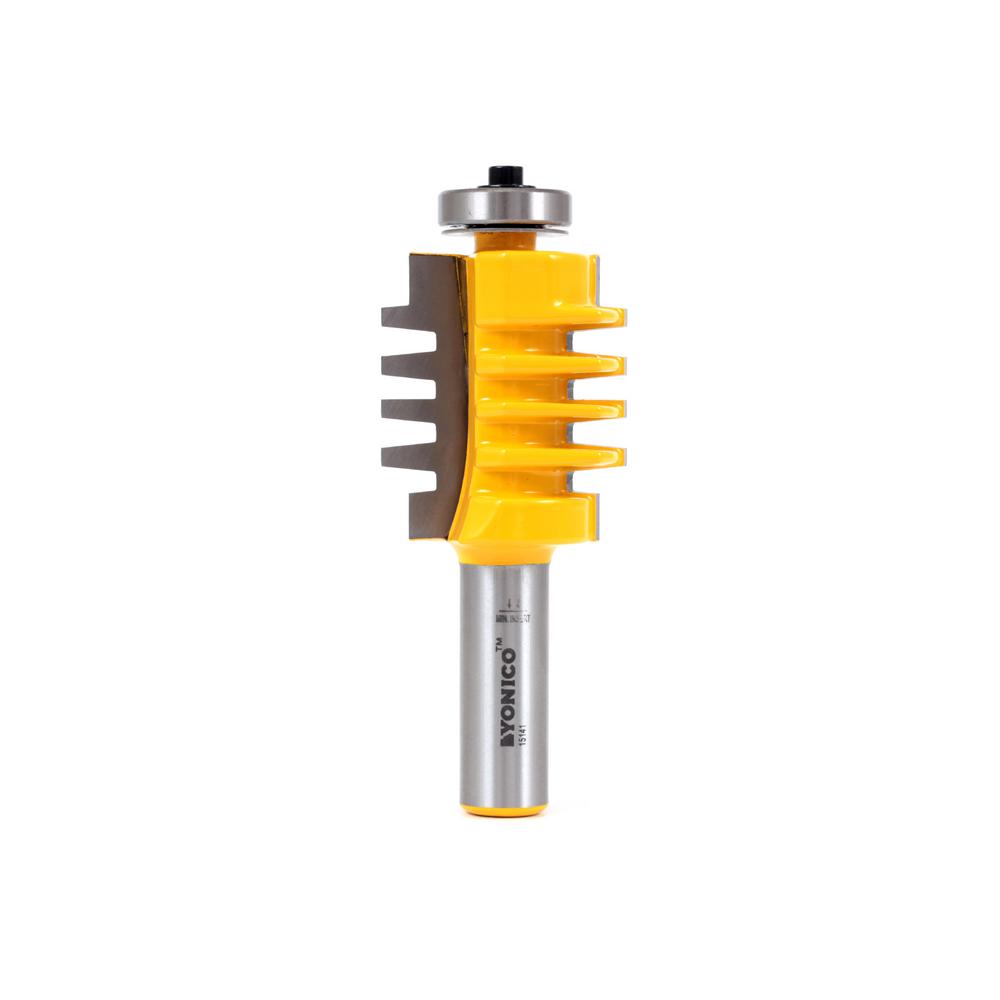
Yonico Easy Setup Finger Joint 1 1 2 In L X 1 2 In Shank Carbide
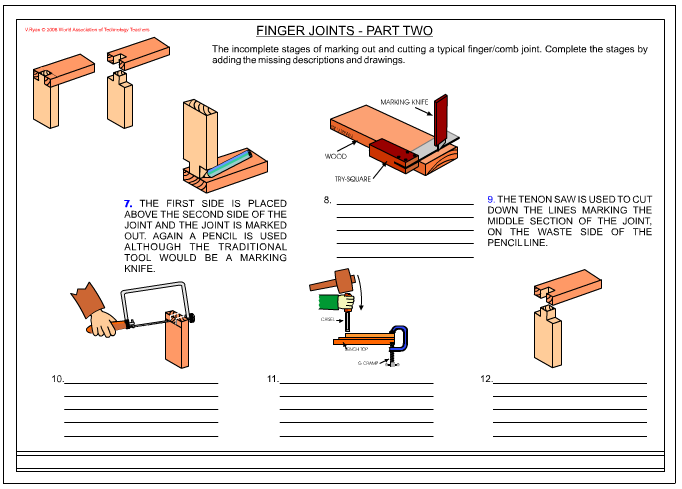
Marking Out A Finger Joint Part 2

China Oak Birch Finger Joint Board Worktops Countertops Benchtop

How To Draw Hands Part 1 Construction Rapidfireart
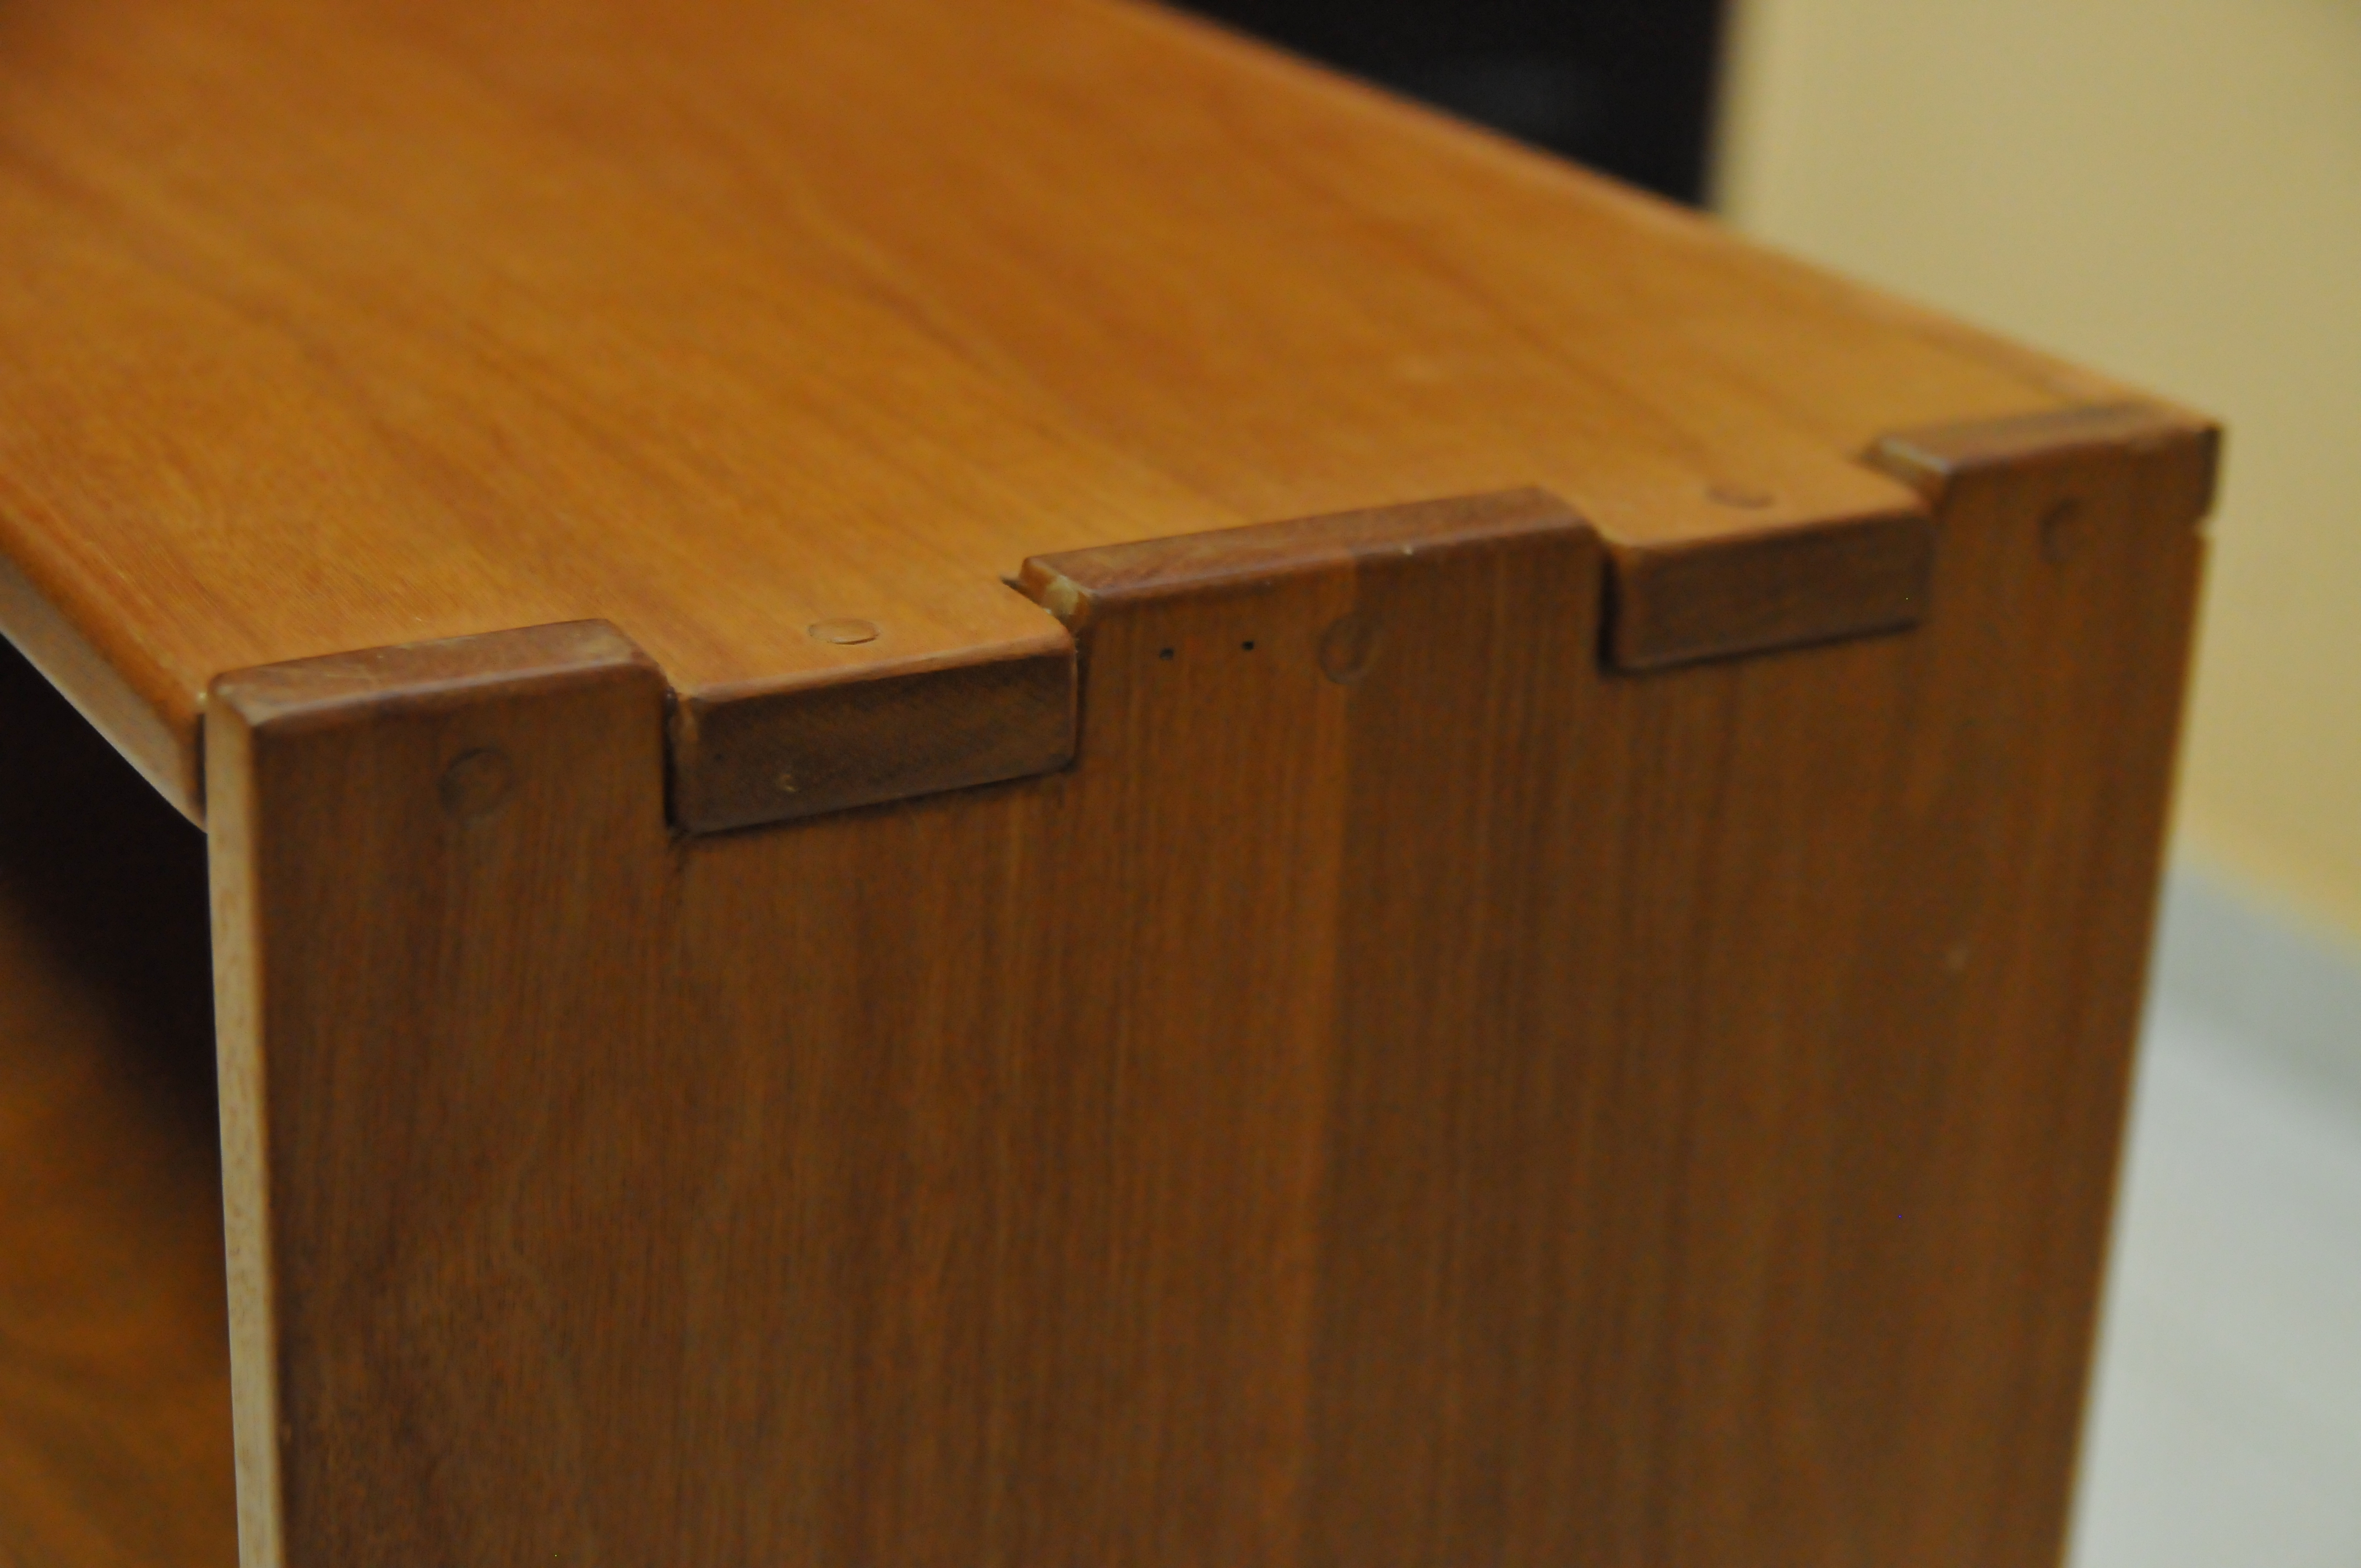
Proud Finger Joint Greene And Greene Quality Furniture
