How To Cut Perfect 45 Degree Angles For Trim

Create Perfect Mitered Corners With 45 Degree Cross Cut Sled Youtube
14 Pro Approved Tips For Tight Miters The Family Handyman

The Cnc Router Temay Medium
This may be accurate enough depending on what youre doing.

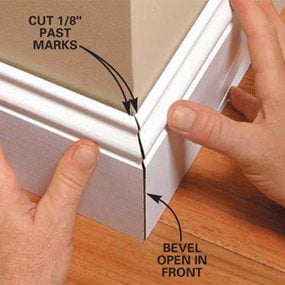
How to cut perfect 45 degree angles for trim. Picture frame test method go ahead and cut one end off at this angle from a 2 piece. The most common baseboard corner is an inside 90 degree corner and the easiest way to install baseboards to fit this corner is to cut two pieces of the baseboard at the edges and at an angle so. Then position the trim to the right of the saw. Get cool stuff support the channel.
This joins the two boards with one uniform joint. When cutting trim for 90 degree corners you are required to cut each board with a 45 degree cut. Test fit the corner trim pieces hold the boards in place to check the fit. Doing this is similar to cutting an outside corner.
If you dont know how to cut a 45 degree angle just look at the angle measurements on the base of the miter saw. Cut 45 12 degree angles on both boards leaving each an extra 18 in. However thats only half the battle. Learn how to quickly cut a 45 degree angle cut with a circular saw on a quarter round or molding.
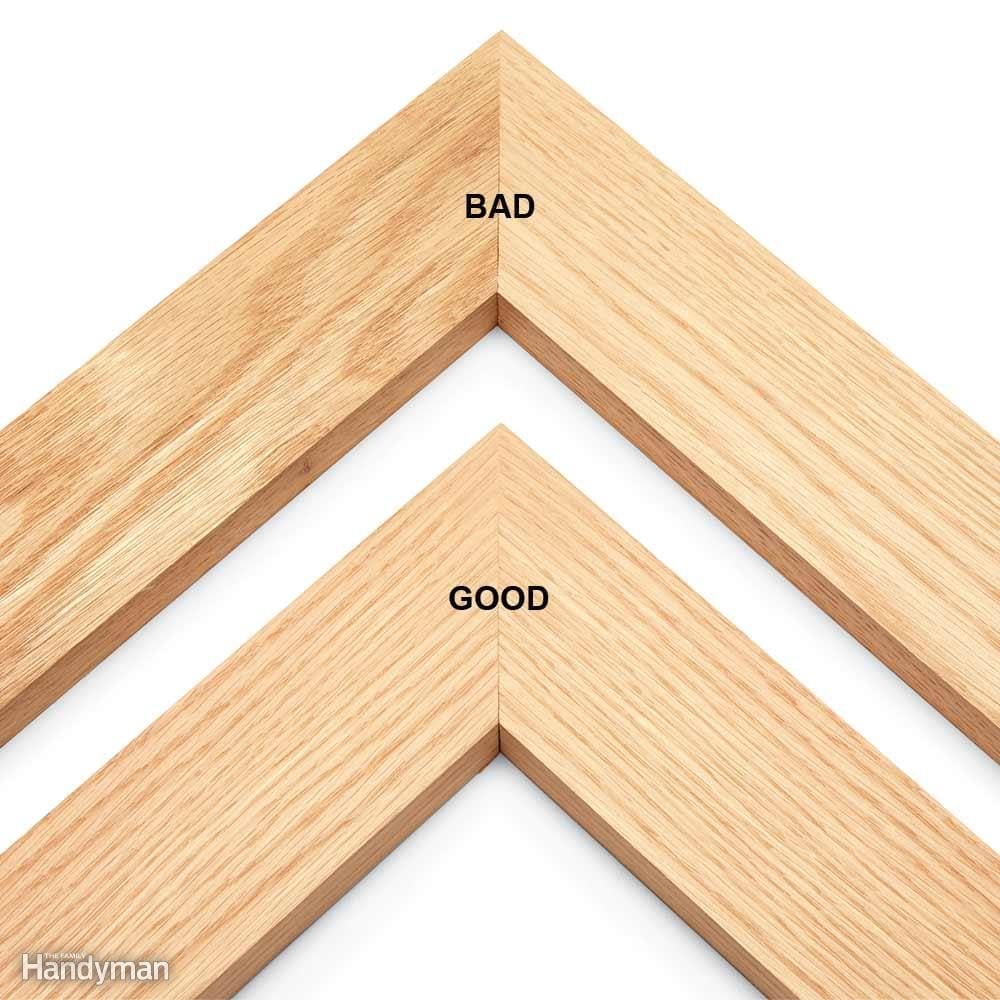
To get the most from your your miter gauge calibrate it first read this. Use your speed square to initially set the angle of the miter gauge. Those slick 45 degree mitered corners coupled with slippery glue are enough to stress out any unwary woodworker. Turn the angle gauge clockwise until it is oriented to the left hand 45 degree angle setting.
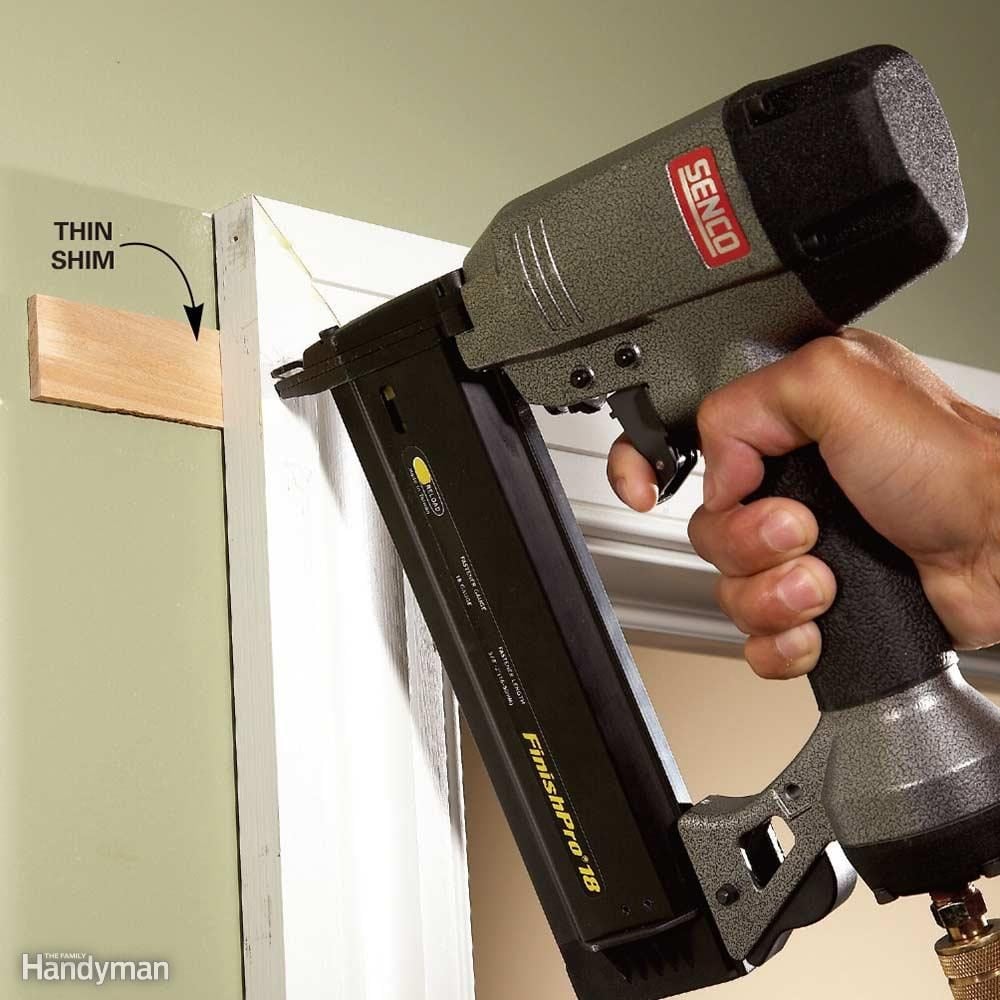
Its job is to provide a smooth transition between walls windows and flooring. When trimming doors and windows this is considered the analogy but is seriously far from the truth when trying to achieve nice tight 90 degree miters. Cut a 45 degree angle in a piece of trim with a miter saw. Check your blade for sharpness by cutting a 45 degree miter on a 1x3 or larger piece of oak or other hardwood.
Cut all the way through the trim to create the corner angle. In my last post about cutting perfect miter joints i covered the fundamentals. If you want to cut perfect miters with this set up youll want to do some test cuts first.
Perfect Trim On Doors Windows And Base Moldings
Perfect Miters Every Time The Family Handyman

Calculating Length Of 45 Degree Angle Board Woodworking Tips

A New Way To Add Detailing To A Wall Wood Trim With X S

3 Ways To Cut Corner Trim Wikihow
Miter Cut Definition

45 Degree Angle Cutting Roller Board Craftykit

How To Cut Over 45 Degrees On Your Miter Saw Youtube

Tips For Tighter Miters And Better Coped Joints Cpt
